Ceiling cracks can be more than just an aesthetic issue. They can signal underlying structural problems that need immediate attention. Fixing ceiling cracks properly is crucial for both the appearance and structural integrity of your home. This guide will walk you through everything you need to know about identifying, diagnosing, and fixing ceiling cracks—from minor cosmetic issues to more serious problems requiring professional intervention. We’ll cover everything, from DIY fixes to when you should call a professional. We’ll delve into different types of cracks, various repair methods, and preventive measures. This comprehensive approach will equip you to address ceiling cracks effectively and efficiently.
Identifying the Types of Ceiling Cracks
Understanding the types of ceiling cracks is the first step in effective repair. Different types of cracks often point to different causes, which determine the appropriate course of action. Understanding these distinctions allows you to choose the right approach and avoid making the problem worse. Ignoring a deeper structural issue can lead to more significant damage over time.
Minor Cracks
Minor cracks, typically hairline fissures, are often cosmetic. They are usually superficial and don’t pose a significant structural threat. These cracks may be caused by settling, slight temperature fluctuations, or even minor impacts. They can often be repaired with simple patching techniques.
Larger Cracks
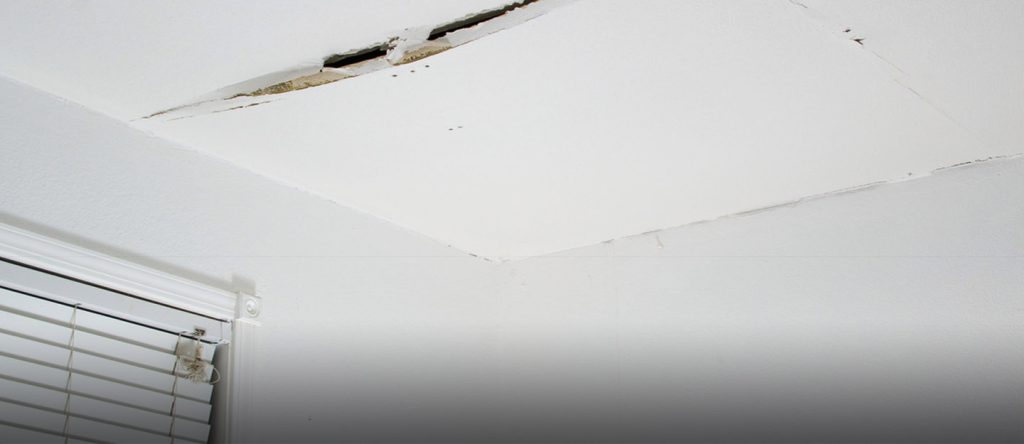
Larger cracks, often extending across a section of the ceiling, might signal underlying structural issues. They can be more difficult to repair and may necessitate the involvement of a professional. Factors like water damage, foundation problems, or even faulty construction can cause these cracks. A proper diagnosis is essential to choose the correct fix.
Diagnosing the Root Cause
Determining the root cause of ceiling cracks is critical for effective repair and preventing future problems. A thorough inspection can reveal underlying issues that extend beyond the superficial damage. By understanding the root cause, you can choose the correct repair method and prevent the issue from recurring.
Inspecting for Water Damage
Water damage is a frequent culprit in ceiling cracks. Look for stains, discoloration, or mold around the cracks. Water damage can weaken the ceiling material, leading to cracking. Moisture intrusion from leaks or plumbing problems needs immediate attention.
Checking for Structural Issues
If you suspect structural issues, it’s essential to seek professional help. A structural engineer can assess the foundation, support beams, and other elements of the home to identify any underlying structural problems that are contributing to the cracks.
Choosing the Right Repair Method
Once the type of crack and underlying cause are identified, you can select the most appropriate repair method. The selection depends on the severity and cause of the crack. Incorrect application can lead to further issues. For minor cracks, a simple patching job might suffice.
Patching Minor Cracks
Minor cracks can usually be patched using a patching compound and a putty knife. Apply the compound thinly, smooth it out, and allow it to dry completely. For a more durable repair, consider using a specialized crack filler designed for ceilings.
Repairing Larger Cracks
For larger cracks, you might need to use a more substantial repair method. This usually involves a combination of filling the crack and potentially reinforcing the area. If the crack extends significantly or you’re unsure about the structural integrity, contacting a professional is always advisable.
Preventing Future Ceiling Cracks
Proactive measures can help prevent future ceiling cracks, ensuring long-term structural integrity. By identifying and addressing potential sources, you can significantly reduce the risk of future issues.
Addressing Moisture Issues
Addressing moisture issues—such as roof leaks or plumbing problems—is crucial in preventing ceiling cracks. Ensure that gutters and downspouts are functioning correctly and that your roof is well-maintained. Promptly addressing any water damage is essential.
Inspecting for Structural Problems
Regular structural inspections, ideally conducted by a professional, can help identify potential problems early on. Early detection allows for timely intervention, saving you time and money, and preventing significant damage to your home.
When to Call a Professional
In some situations, addressing ceiling cracks requires expertise beyond DIY capabilities. Recognizing these situations is essential to ensure the proper resolution and prevent further damage.
Extensive Damage
If the cracks are extensive or you’re unsure about their cause, consulting a professional is always the best approach. A qualified contractor can accurately diagnose the issue and implement the correct repair methods.
Structural Concerns
If you suspect structural issues, contacting a structural engineer is necessary to evaluate and address the problem. Structural damage can lead to considerable risk and cost if left unaddressed.
Additional Tips for Fixing Ceiling Cracks
Following these additional tips can help enhance the effectiveness and longevity of your ceiling crack repair.
Preparing the Surface
Ensure the surface is clean and free of debris before applying any repair material. This ensures proper adhesion and a smooth finish.
Using Appropriate Materials
Using the right materials for the job is essential for a lasting repair. Consider specialized ceiling crack fillers for optimal results.
Common Mistakes to Avoid
To avoid common mistakes, be mindful of potential pitfalls during the repair process and take the necessary steps to avoid complications.
Applying Too Much Material
Applying too much repair compound can lead to an uneven, bumpy surface, potentially detracting from the look of the ceiling. Apply the compound in thin layers and allow each layer to dry before adding more.
Forgetting to Prime
Failing to prime the surface can affect the adhesion of the repair material. Priming ensures optimal bonding and prevents the compound from chipping or peeling off over time.
Ensuring a Professional Finish
For a polished and long-lasting finish, pay attention to the steps involved in achieving a professional look.
Smoothing the Surface
Use a putty knife or sandpaper to carefully smooth the surface after the repair compound dries. Ensure there are no visible imperfections. Apply multiple thin coats if needed.
Painting or Finishing
Once the repair compound has fully cured, repaint or apply the desired finish to blend the repair seamlessly with the rest of the ceiling.
Maintaining a Healthy Ceiling Environment
Proactively safeguarding your ceiling’s health can prevent problems before they start.
Checking for Moisture
Regularly inspect your ceiling for any signs of moisture, such as stains, mold, or discoloration. Promptly address any sources of moisture, such as leaks, to avoid potential damage.
Regular Maintenance
Routine maintenance is crucial. Regular inspections of the attic space or roof can identify potential issues before they escalate into significant problems. A well-maintained home is less susceptible to issues like ceiling cracks over time.
In conclusion, fixing ceiling cracks like a pro involves a systematic approach. Understanding the cause, choosing the right repair method, and ensuring proper application are key to a successful outcome. Whether you’re tackling minor cracks or extensive damage, following these steps can help you achieve a beautiful and structurally sound ceiling. For more detailed guidance or if you’re unsure about any aspect of the repair process, consulting a professional is always recommended. Contact a qualified contractor for expert advice and assistance.