DIY roof painting is a rewarding home improvement project that can save you money. Imagine a vibrant, freshly painted roof that not only enhances your home’s curb appeal but also extends its lifespan. But tackling a roof can feel daunting if you don’t have experience, and it’s easy to make mistakes! This guide breaks down DIY roof painting into manageable steps, ensuring a professional-looking finish. We’ll cover everything from crucial preparation to choosing the right paint, offering you practical tips, and addressing common challenges. Let’s dive in and uncover the secrets to successful DIY roof painting!
Choosing the Right Paint and Supplies
Selecting the Best Paint for Your Roof
Choosing the right roofing paint is crucial for a long-lasting, aesthetically pleasing result. Many homeowners are drawn to the cost-effectiveness of DIY roof painting, but choosing the correct paint significantly impacts the project’s success and long-term viability. Consider factors like the type of roof material, the climate in your region, and the desired level of protection. Some paints are specifically formulated for asphalt shingles, metal roofs, or clay tiles. Incorrect paint choice can lead to premature weathering, cracking, or peeling, rendering your efforts futile. Research paints specifically designed for roofing applications and always read labels carefully, paying close attention to coverage recommendations and drying times. Consider the environmental conditions—heat, humidity, and rainfall—that affect your area, as well as the paint’s resistance to these elements.
Essential Roofing Supplies for Your Project
Gathering the necessary supplies is essential for a smooth workflow, minimizing headaches and maximizing productivity. Your kit should include top-quality paint rollers, brushes, drop cloths, a ladder, a safety harness, and a paint sprayer (optional, but recommended for large areas). A good quality paint sprayer will help to ensure consistent coverage and prevent drips or uneven coats. Ensure the ladder you choose is robust and tall enough to reach the highest points of your roof safely. Don’t forget to equip yourself with protective gear like gloves, safety glasses, and a mask. Also, consider purchasing a roofing brush, designed for effective and efficient application on challenging surfaces. It’s also highly recommended to obtain extra drop cloths to ensure full protection to the ground beneath.
Essential Preparation Steps
Thorough Roof Inspection
Before you pick up a paintbrush, a comprehensive roof inspection is crucial. Check for loose or damaged shingles, missing granules, and areas of severe wear. Addressing these issues proactively can prevent more substantial problems down the line. A thorough inspection allows you to identify areas requiring repair or replacement before painting, ensuring the longevity of your newly painted roof. Be mindful of potential leaks in shingles, which can cause significant damage. If you find any structural issues, it’s important to schedule a roof repair job with a qualified contractor to avoid complications when painting. Consult a professional if you aren’t equipped to handle structural repairs.
Cleaning and Removing Debris
Thoroughly clean your roof of any debris, like leaves, twigs, or dirt, using a roof cleaning brush. This step removes contaminants that can affect the paint’s adhesion and longevity. Consider using high-pressure cleaning tools cautiously, ensuring not to damage shingles or other roof components. A clean roof surface ensures proper paint adhesion, which leads to a more lasting and appealing finish.
Painting Techniques for a Smooth Finish
Applying Even Coats of Paint
Applying even coats of paint is crucial for a professional-looking finish. Start by applying the first coat with a paint roller, working in sections, ensuring each section is fully saturated before moving to the next. Consider using a paint sprayer for larger areas to ensure even coverage and prevent drips or unevenness. When using a paint sprayer, follow the manufacturer’s instructions carefully for optimal results.
Painting Techniques for Different Roof Areas
Painting techniques vary based on the roof’s area. Use long, even strokes for smooth, flat surfaces, and focus on overlap to ensure coverage in complex areas. When tackling curved or sloped sections, adapt the application technique to maintain consistent paint coverage.
Painting Tips for Different Roof Types
Painting Asphalt Shingles
Painting asphalt shingles requires careful preparation and the correct paint. Use a paint roller with a high-quality paint to achieve a uniform finish. When painting asphalt shingles, ensure your paint selection adheres to the guidelines for asphalt roofing systems. Avoid applying too much paint, which could lead to pooling and other issues.
Painting Metal Roofs
Painting metal roofs presents a unique set of challenges. Ensure the metal surface is completely clean and free of rust. Use specialized metal primer or paint to improve adherence to the surface.
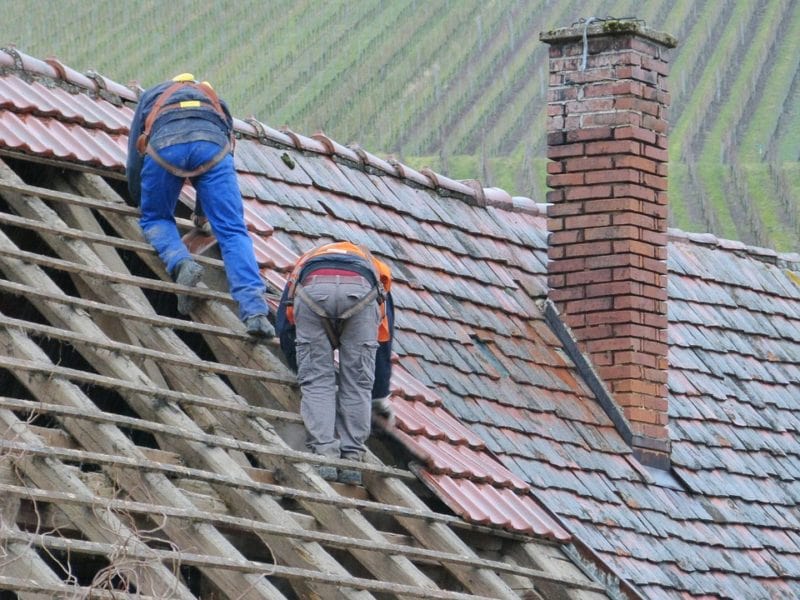
Important Safety Precautions
Working at Heights
Working on a roof involves significant risk. It is imperative to prioritize safety when tackling DIY roof painting. Always use a sturdy ladder and appropriate safety gear like a safety harness and fall protection system to avoid serious injuries. If you’re unfamiliar with working at heights, consider hiring professional help.
Weather Considerations
Check the weather forecast before starting your project. Avoid painting in wet or windy conditions. Painting in extreme temperatures can also negatively impact the paint’s performance and drying time.
Additional Tips and Troubleshooting
Handling Difficult Roof Areas
Some areas of a roof can be challenging to paint, such as valleys, ridges, and areas near chimneys or vents. Consider using a fine-tipped brush or a small roller for these tricky spots to achieve a flawless finish. Proper preparation of these areas is crucial.
Cost-Effectiveness of DIY Roof Painting
Comparing DIY Costs vs. Professional Services
DIY roof painting can be a more cost-effective solution for homeowners, especially with careful planning and execution. However, for complex or large roofs, professional services may be the better option. If you are unsure or lack experience working at heights, it’s strongly recommended to contact professional roofing contractors.
Enhancing Roof Aesthetics
Integrating Color and Design
Choosing colors and incorporating unique designs can add character to your home. Research color palettes that harmonize with your home’s exterior and personal taste.
Long-Term Maintenance
Maintaining Your Painted Roof
Regular roof maintenance, such as clearing debris and checking for damage, extends your roof’s life and helps prevent significant repair costs. Ensuring your painted roof is cared for will provide a high level of value to your home.
Frequently Asked Questions
What is the best time to paint a roof?
The ideal time to paint a roof is when the weather is dry, warm, and calm. Avoid painting in direct sunlight or when the temperature is extremely high, as this can affect the paint’s drying time and quality. Always check the weather forecast and manufacturer instructions for specific recommendations.
How much does it cost to paint a roof DIY?
The cost of DIY roof painting varies depending on factors like the size of the roof, the type of paint used, the amount of preparation needed, and whether you require professional assistance. It can range from several hundred to several thousand dollars. Consider the costs of materials, tools, and your time when making a budget.
In conclusion, DIY roof painting is a rewarding project, but it requires careful planning and execution. By following these tips, you can achieve a professional-looking finish and extend the lifespan of your roof. Remember to always prioritize safety, use the right tools, and consider hiring a professional if needed. For a comprehensive guide on roof maintenance, check out our ultimate guide to roof care!